Ray Bans are a symbol of style, quality, and elegance, but they are also an investment. Scratches on the lenses can be particularly frustrating, especially when they interfere with vision or the aesthetic appeal of these premium sunglasses. Fortunately, even deep scratches can sometimes be improved or eliminated with careful techniques. In this guide, we’ll show you the best methods to fix scratches on Ray-Ban lenses, helping you restore their clarity and prolong their lifespan.
Understanding the Types of Scratches on Ray BanS Lenses
Before we get started, it’s important to recognize the type of scratch you’re dealing with. Ray Ban lenses can have shallow or deep scratches. While shallow scratches might be easy to fix at home, deeper scratches require more careful attention and may need professional help.
- Shallow Scratches: These are light surface-level marks that often don’t impact the structure of the lens.
- Deep Scratches: These penetrate more into the lens material, affecting clarity and sometimes even durability.
Materials You’ll Need to Fix Scratches on Ray-Ban Lenses
To repair deep scratches, having the right tools is essential. Gather the following items before you begin:
- Lens Repair Kit: Available at most optical shops, these kits contain specially formulated solutions for repairing lens scratches.
- Microfiber Cloth: Essential for cleaning without adding new scratches.
- Baking Soda Paste: Known for its gentle abrasive qualities.
- Toothpaste (Non-gel, Non-abrasive): Provides a mild abrasive surface ideal for removing shallow scratches.
- Metal or Plastic Polish (Optional): Effective for plastic lenses, but use cautiously.
- UV Protection Coating Spray: For added protection after repairs.
Step-by-Step Guide to Fix Deep Scratches in Ray-Bans
1. Clean the Lenses Thoroughly
Before attempting any scratch repair, it’s vital to clean your Ray-Ban lenses meticulously to avoid embedding dirt into the scratches.
- Use a Microfiber Cloth: Dampen the cloth slightly and wipe away any dust or smudges.
- Apply Lens Cleaner: A few drops of lens cleaner on the cloth help to remove oils or residues that may interfere with scratch repair.
2. Test the Scratch Depth
Gently run your fingernail across the scratch to gauge its depth. If your nail catches, it indicates a deep scratch that will require additional attention.
3. Use Baking Soda Paste for Initial Buffing
Baking soda can act as a gentle abrasive to minimize the appearance of scratches.
- Create a Paste: Mix one tablespoon of baking soda with a few drops of water to form a thick paste.
- Apply to the Scratch: Using a circular motion, rub the paste into the scratch with a microfiber cloth.
- Rinse and Check: Rinse the lens with warm water and inspect. Repeat as necessary but be careful not to overdo it.
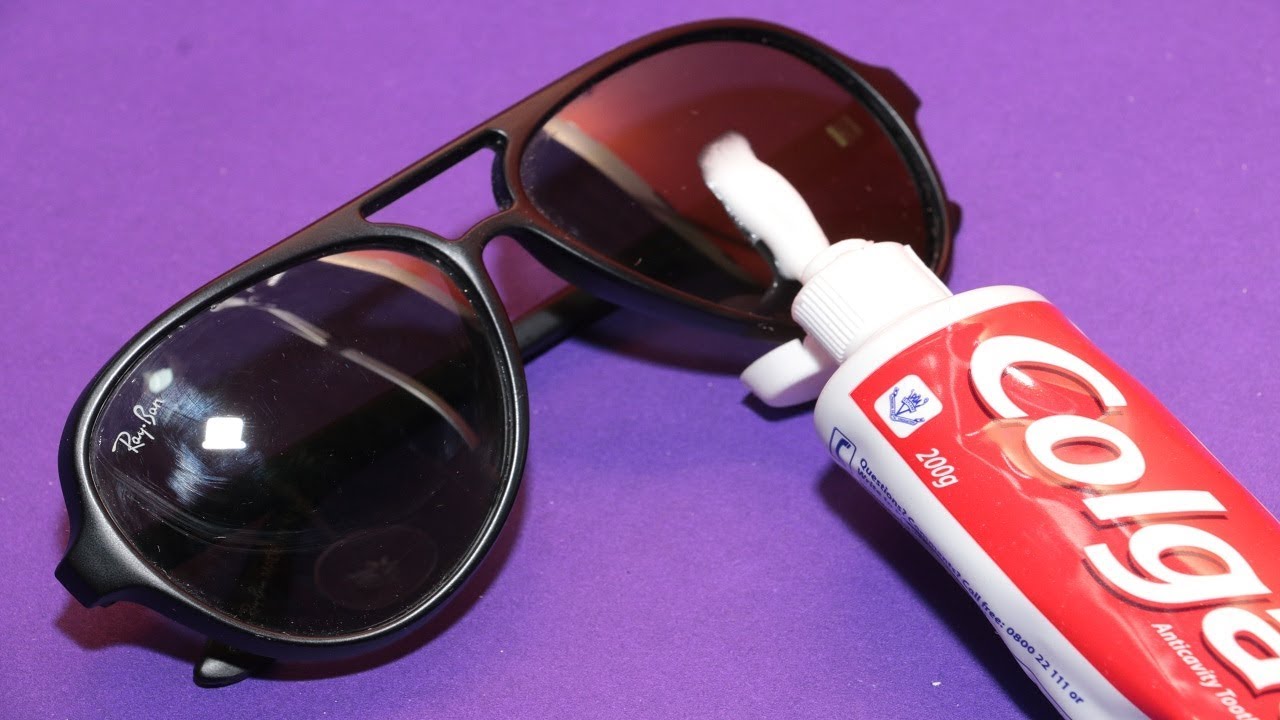
4. Try Toothpaste for Further Polishing
If the scratch persists, non-gel toothpaste can provide a mild abrasive effect that may help reduce scratch visibility.
- Apply a Small Amount of Toothpaste: Dab a small amount on a microfiber cloth.
- Rub in Circular Motions: Apply gently to the scratch, rubbing in circular movements.
- Rinse Thoroughly: Rinse the lenses under lukewarm water and dry them with a clean, dry microfiber cloth.
Note: Avoid abrasive or gel-based toothpaste, as these can damage the lens coating.
5. Consider a Lens Repair Kit for Persistent Scratches
Lens repair kits contain specialized solutions designed to repair lenses more effectively than household items.
- Follow Kit Instructions: Each kit may have different application steps, so follow them carefully.
- Use Light Pressure: Apply a few drops of the repair solution and rub it gently into the scratch with a microfiber cloth.
These kits are particularly useful for polycarbonate or plastic lenses, but they can work on glass lenses as well.
6. Apply Metal or Plastic Polish (If Applicable)
If the Ray-Ban lenses are plastic, a small amount of plastic polish can help.
- Use Sparingly: Apply a tiny amount to a soft cloth and rub it gently over the scratch.
- Buff Carefully: Too much polish can harm the lens coating, so only use this method on lenses without an anti-reflective coating.
7. Finish with UV Protection Spray
After the scratch repair, reapplying a protective layer helps maintain the lens’s durability and protects against future damage.
- Spray Evenly: Apply a thin, even layer of UV protection spray across both sides of the lens.
- Buff Gently: Use a clean, dry microfiber cloth to ensure the spray is evenly distributed.
This final step helps shield the lenses from UV rays and enhances their longevity.
When to Seek Professional Repair
While the above methods are effective, sometimes deep scratches require professional intervention, especially for high-quality lenses like Ray-Bans. If the scratch affects your vision or persists despite multiple repair attempts, it’s best to consult a Ray-Ban retailer or optician. Many opticians offer professional polishing services or lens replacements to restore clarity.
Preventing Future Scratches on Ray-Bans
Here are a few preventive measures to keep your Ray-Bans scratch-free:
- Use a Protective Case: Always store Ray-Bans in a hard-shell case when not in use to prevent accidental scratches.
- Clean Regularly: Avoid using abrasive materials like paper towels. Always use a microfiber cloth for cleaning.
- Avoid Harsh Environments: Sand, dust, and saltwater can be damaging to lenses, so handle Ray-Bans with care in these conditions.
- Use Lens Protectors: Anti-scratch coatings or lens protectors can provide an additional layer of defense.
Conclusion
Deep scratches in Ray-Ban lenses can be challenging to repair, but with the right techniques and patience, they can be minimized or even removed. Always start with the gentlest methods and work your way up to more intensive solutions. If scratches persist, professional services are always an option. Proper maintenance and preventive measures will ensure your Ray-Bans stay in top shape for years to come.